You can integrate the shipping provider GLS directly with Shippinglabel using the ShipIT API interface. This step-by-step guide walks you through the entire setup process — ideal for first-time users.
Requirements
Before you start the setup, please make sure that:
- You have an active GLS business account
- You received the ShipIT API credentials from your GLS contact
You will need the following four values to establish the connection:
| Field | Description |
|---|---|
| ShipIT Username | Your personal GLS API username |
| ShipIT Password | Your API authentication password |
| ShipIT Contact-ID | Your customer ID or internal GLS ID |
| ShipIT Service-URL | The full API interface URL from GLS |
Step-by-step Setup Guide
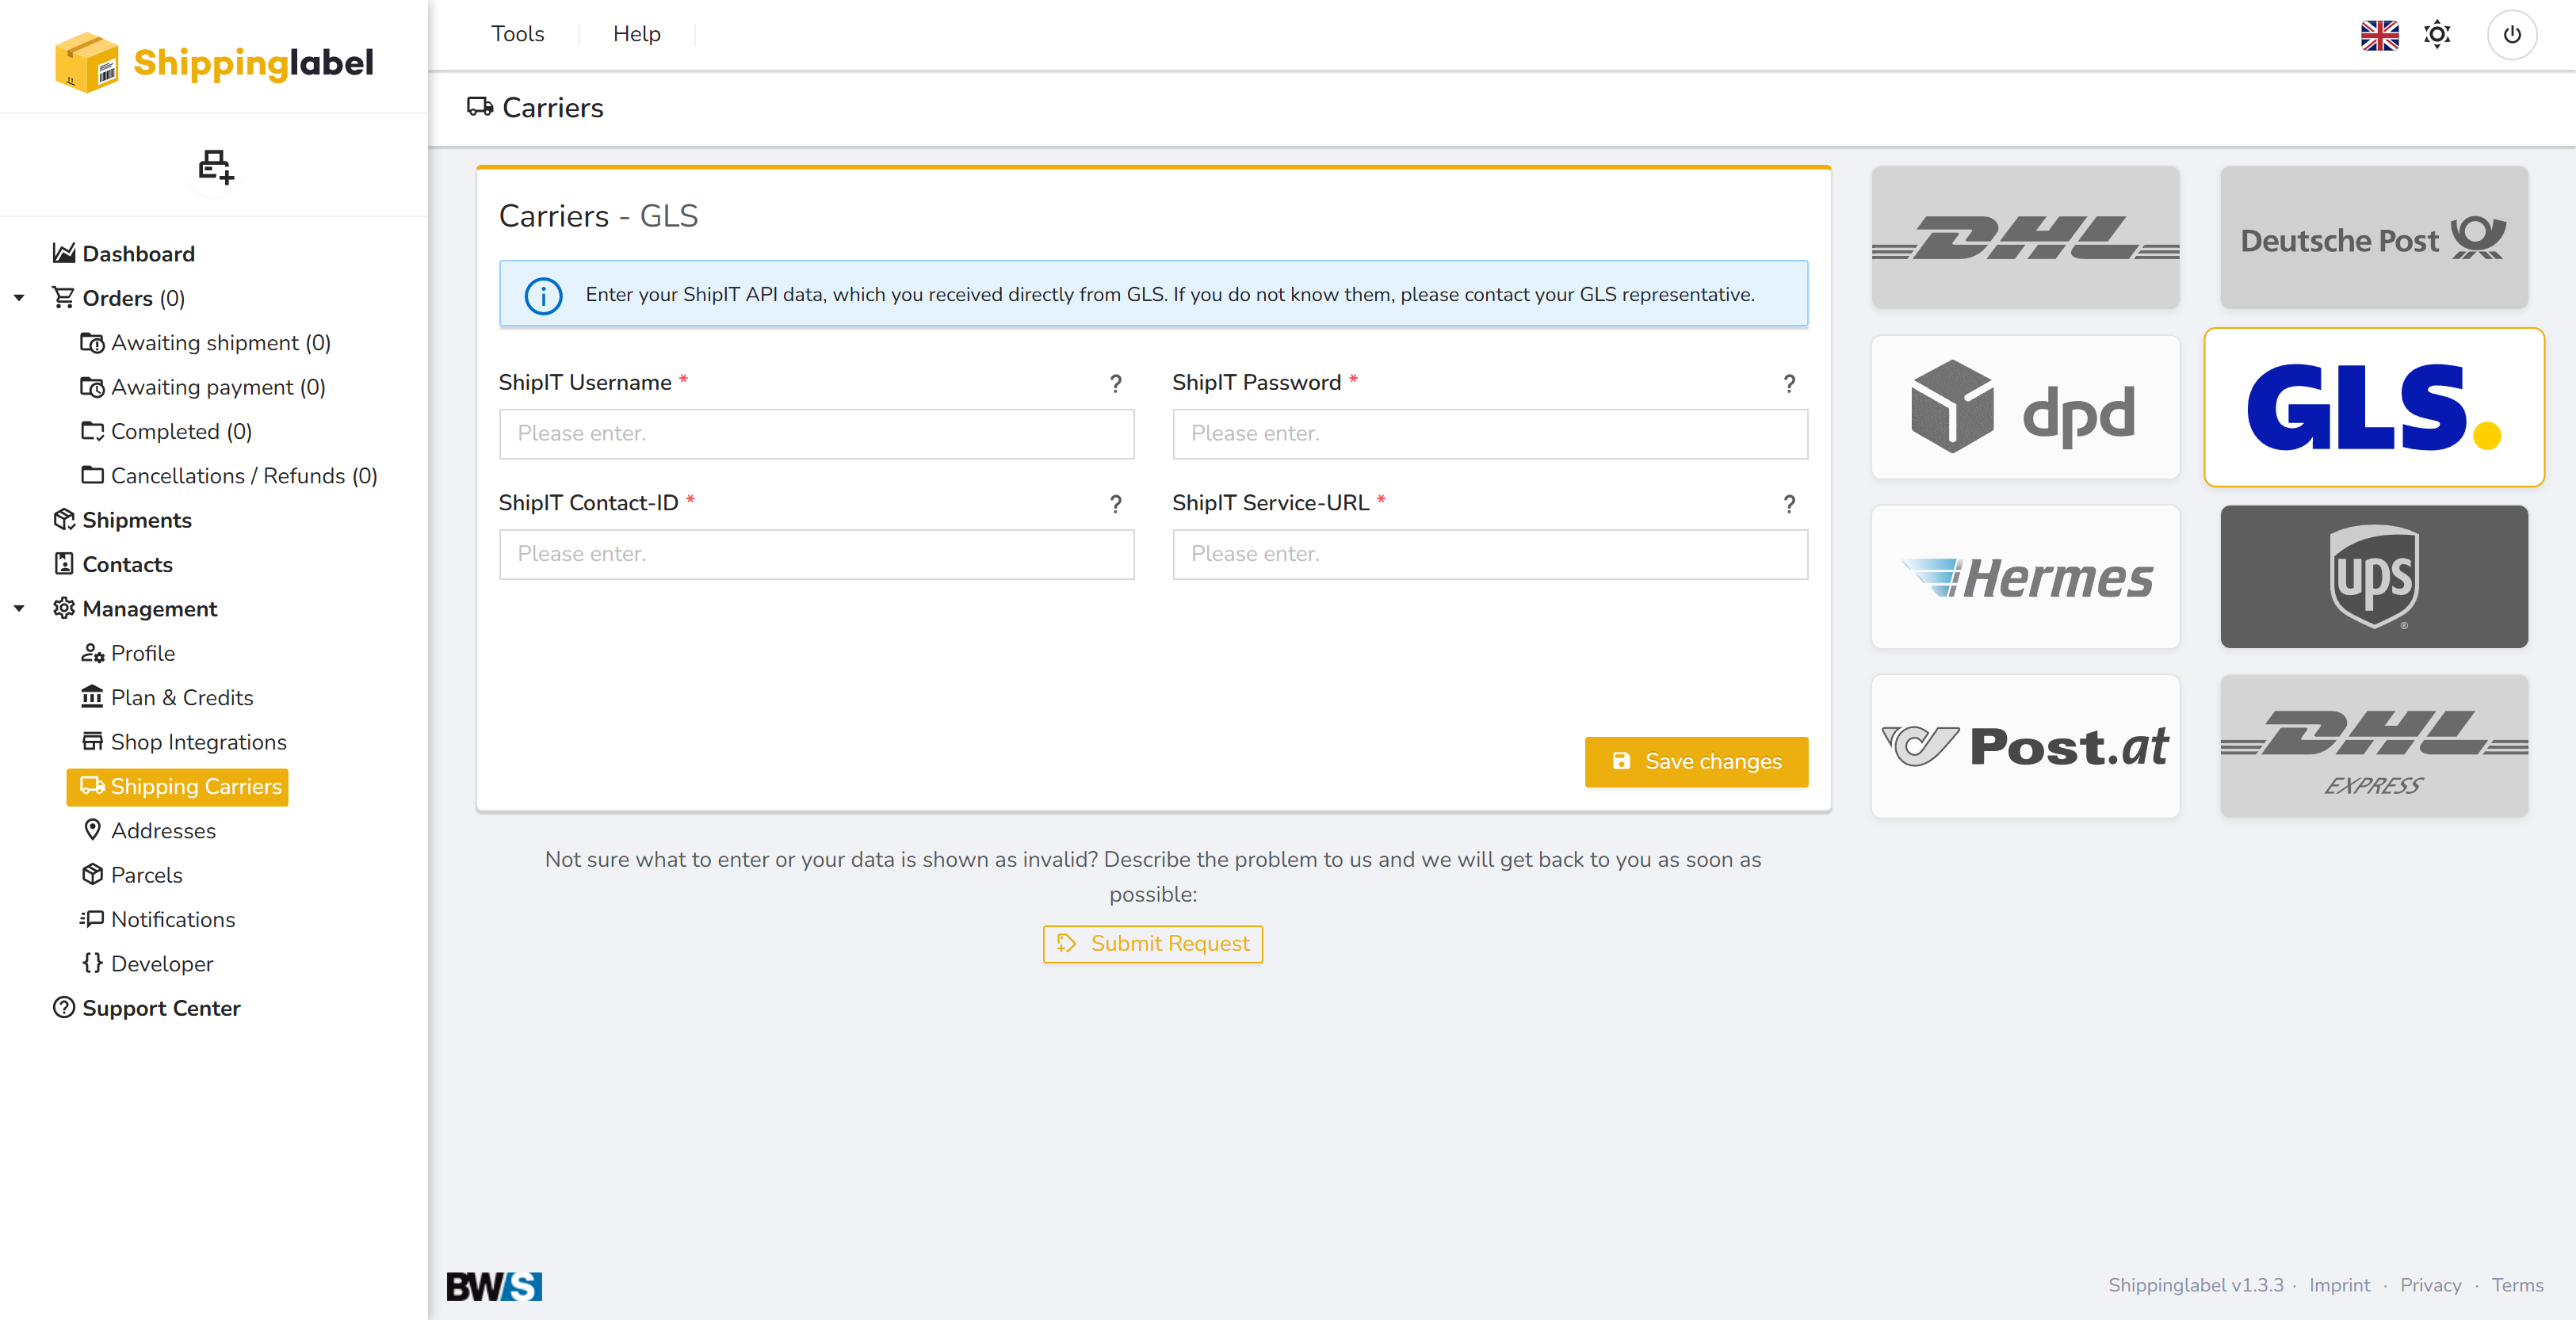
1. Open the “Shipping Carriers” section
Log in to Shippinglabel.
In the left sidebar, go to Management > Shipping Carriers.
Click the GLS logo to open the setup area.
2. Enter your credentials
Fill in the fields with the exact credentials provided by GLS:
- ShipIT Username – Your API username from GLS
- ShipIT Password – Corresponding API password
- ShipIT Contact-ID – Your customer or internal GLS ID
- ShipIT Service-URL – The full API endpoint URL
💡 Be sure to enter the URL without extra spaces or invalid characters.
3. Save changes
Once all fields are filled out, click Save changes at the bottom right.
Shippinglabel will automatically test the connection to the GLS interface.
Troubleshooting
If you encounter an error during saving or connection:
- Double-check all fields for typos or incorrect structure
- Ensure all data is current and valid
- Contact your GLS representative to verify credentials if needed
- Alternatively, use the Submit Request button in the interface to reach our support team
✅ Summary of Required Fields
| Field | Description |
|---|---|
| Username | Your GLS API access username |
| Password | Your API password |
| Contact-ID | Customer or internal GLS ID |
| Service-URL | ShipIT API endpoint URL |